How to Use a Joint Roller
As much as we like to imagine ourselves as masters of our craft, rolling joints can be tough. I’ve had more than one fall apart on me mere moments before taking a hit – trust me, there’s nothing more disappointing.
Also Read: Smoke Buddy Review
To be real, there’s a much simpler way that’ll pretty much guarantee you getting a perfect joint every time – using a joint rolling machine. They’re cheap, they’re effective and they work really well. But there’s a big problem – how the fuck do these things work?
I won’t lie, they look really fucking weird. First time I saw one I was super confused as to how they work. Not to worry though, I’ve since figured it out and I’m here to impart my sage wisdom to you – the future of the joint rolling community. It’s really not that hard either. Once you figure it out you’ll be rolling perfect joints for days.
Which Joint Roller Works the Best?
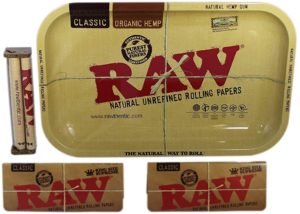
There are tons of different machines used to roll joints – some of them are really fucking expensive too. For the purposes of this tutorial I’ll be using a standard RAW Hemp Plastic Cigarette Rolling Machine. It’s only about $5 and works extremely well. Yea, there are better options out there but unless you’re planning on rolling a lot of joints or cigarettes, I’d suggest you just go with this one. It’ll save money and do you well.
How to Use a Joint Roller
Below is a quick 6 step process that’ll get you rolling perfect joints instantly. First, let’s take a look at what we’ll need.
What You’ll Need
- RAW Cigarette Roller (or the roller of your choice)
- Weed (no shit…)
- Weed Grinder
- Filters
- Rolling Paper
Note: If you don’t have any of these yet, I’d suggest just grabbing the RAW Rolling kit. It’s got everything you need (except the tips and the grinder) and works really well. If you need tips you can get them here and if you need a grinder, this one works really well.
Step 1: The Setup
The unofficial first step is to grab yourself either a larger piece of paper or a small tray to work on. Even after you get good at this, it can be a bit messy. Something simple like this should work well but if you don’t want to bother buying a tray, just grab yourself a regular size 8.5 x 11 sheet of paper or a paper plate and try to keep the mess on there.
Next you’ll need to grind your weed. Anywhere between 0.5 and 1.5 grams should work well. You can go up to 2g if you want but at that point you run the risk of packing it too tight and not being able to take a hit. As awesome as super fat joints are, if you can’t take a hit it doesn’t do you any good. Err on the side of less as opposed to more – you can always make a second one later if you’ve got some extra pot left over.
When you’re grinding your weed, just keep it in the container until you insert it into the roller.
Step 2: Insertion
You’ll want to make sure that the paper between the two rollers have a bit of slack – this will allow you to fill it up a bit more. Then you’ll want to open up the RAW Rolling Machine by sliding it up and over. You should be able to see grooves on each side for the pegs to go through – use those. Then take your weed and place it between the two rollers on one side. There should be just a tiny bit sticking above the fold (the area between the two rollers) but not much. Again, cramming to much in won’t make a good joint. You’ll need decent air flow to be able to take a good hit and if it’s packed too tight you won’t be able to do that.
Make sure to place your weed on one side or the other to make room for the tip.
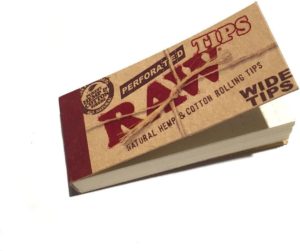
Step 3: The Tip (Optional)
Next you’ll want to make and insert your tip. This isn’t totally necessary, but I prefer it because it helps you smoke everything without burning the tips of your fingers.
First you’ll want to pull a tip out of the booklet you’ve got. Next, you’ll zig zag about half of it and then roll the rest. Take about 1/10th of the paper and fold it to the side. Then take the amount that’s folded over and fold it back on itself. Keep doing this until you’ve got about half the paper folded. Take the rest and roll it around the zagged center.
When you’re done making the tip, simply place it in the end that you didn’t put the weed. There you go, no more burnt fingers.
Step 4: Rolling
Once your weed is packed snugly between the two rollers you’ll want to start rolling. This might sound a bit complicated, but it’s actually pretty intuitive once you get the hang of it.
You’ll want to place both of your thumbs about ¼ of the way from the ends of the roll nearest you and place your two index fingers about ¼ in from the ends of the roll farther away from you. At the same time, pull your thumbs towards you and down while you move your fingers away from you and up. Doing both of these motions simultaneously will make sure that both rolls are moving at an even rate giving you an even and well packed joint. If you only do one or the other, the paper will pull in weird ways and you’ll get a joint that ends up looking and working terribly.
It’ll take a time or two to figure this bit out, but once you’ve got the hang of it you’ll have no problem.
Step 5: First Turn
You’ll want to roll both rollers around one full rotation. Depending on what kind of roller you get, it might even have the word “top” that marks the top side of the paper. If not, make sure you’re paying attention to how much your rolling. If you need to, take a pencil or sharpie mark the different rolling points for future use.
Step 6: Inserting the Paper
This step is where we’ll transfer the weed (and the tip if you used one) to the actual paper. Simply take the paper and insert it between the two rolls. Make sure that the sticky end (the part with the glue on it) is sticking up. Then you’ll give your roller about a half turn until only the part with the glue is sticking out. It should only be about a quarter of an inch.
Then give the end a good lickin. This works just like an envelope – wet it with your saliva from end to end before you continue rolling. After its wet, roll about another half turn – you’re done! Just unhinge the roller and take out your freshly rolled blunt.
Rolling Tips
Below we’ve got a few tips to help you if you’re starting out rolling your own blunts with a joint rolling machine
- Less is more. Seriously, don’t pack your shit too tight or you won’t be able to use it at all.
- Make marks on your roller: Especially if you’re just starting out, it’s really helpful to know where the top and bottom of your roll is. Spend 3 minutes with a sharpie marking the different points of your roller so you know where the top and bottom are.
- User Proper Technique: There are tons of weird ways that people use joint and cigarette rollers, a lot of them end up resulting in pretty shitty joints. Make sure you use the proper technique to get full but usable blunts every time.
Rolling It Up: The Perfect Finish
And there you have it — mastering a joint roller is easier than it looks! Once you get the hang of it, rolling becomes less of a chore and more of an art form (kind of like wrapping a mini burrito with precision and pride). Remember these quick tips before you light up:
- Use fresh, evenly ground herbs for a smooth roll.
- Don’t overpack — your roller isn’t a suitcase!
- Give it a gentle spin; speed won’t earn you bonus points.
So next time you’re rolling, ask yourself — “Would this pass the vibe check?” If the answer’s yes, congrats! You’re officially the joint-rolling MVP.